
Upper Body Workout at Home: 10 Powerful Moves, No Equipment
You can build a stronger chest, back, shoulders and arms without a gym or a single weight. An upper body workout at home uses your own body weight as resistance, and it only needs a patch of floor and a sturdy chair. This guide gives you 10 no-equipment moves, a short warm-up, a simple routine with rest times, and tips for recovering well.
Home upper body workouts became useful for me because I could train with little or no equipment. The hardest part when I started was building enough control to perform each movement without rushing.

Before You Start
Pick a spot where you can stretch your arms and legs out without hitting furniture. A non-slip surface helps, and a yoga mat adds grip and cushioning on a hard floor. A wall, a countertop and your knees are your three easy modifications, so keep them in mind if any move feels too hard.
Take a moment to check how your body feels. Roll your shoulders and rotate your wrists, and notice any unusual tension in your lower back. If something feels off, shorten your range of motion or skip that move today.
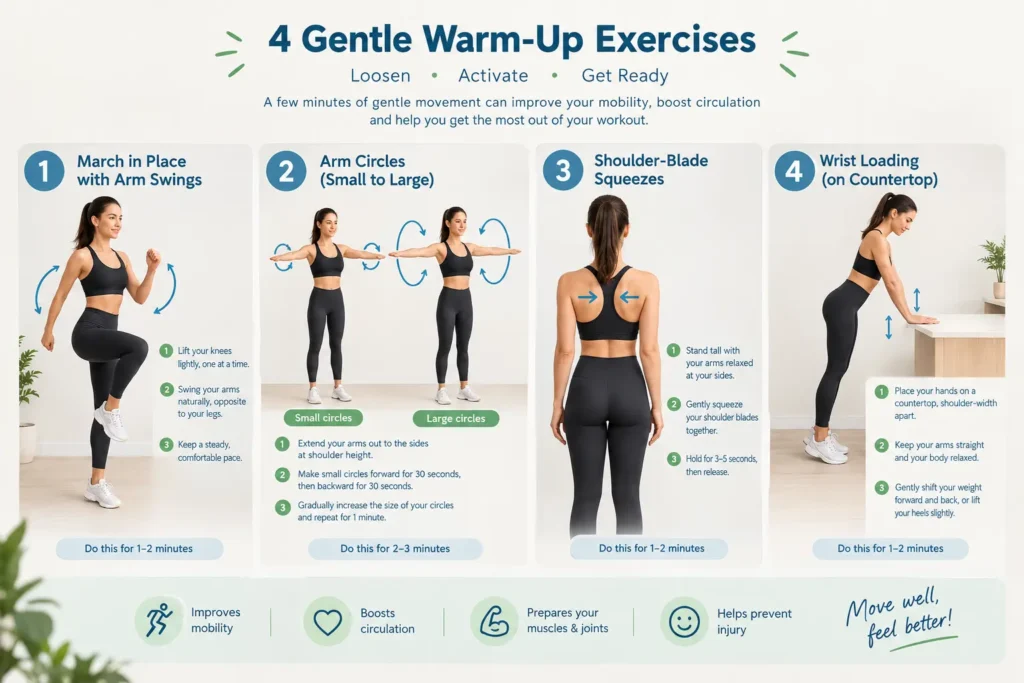
A Quick Warm-Up (3 to 5 Minutes)
March in place with arm swings for one minute to raise your heart rate.
Arm circles: extend your arms to the sides and draw small circles, then bigger ones.
Shoulder-blade squeezes: with your arms at your sides, squeeze your shoulder blades together for one second, then release. Do 10.
Gentle wrist loading: place your hands on a countertop and lean forward slightly to put light pressure through your wrists.
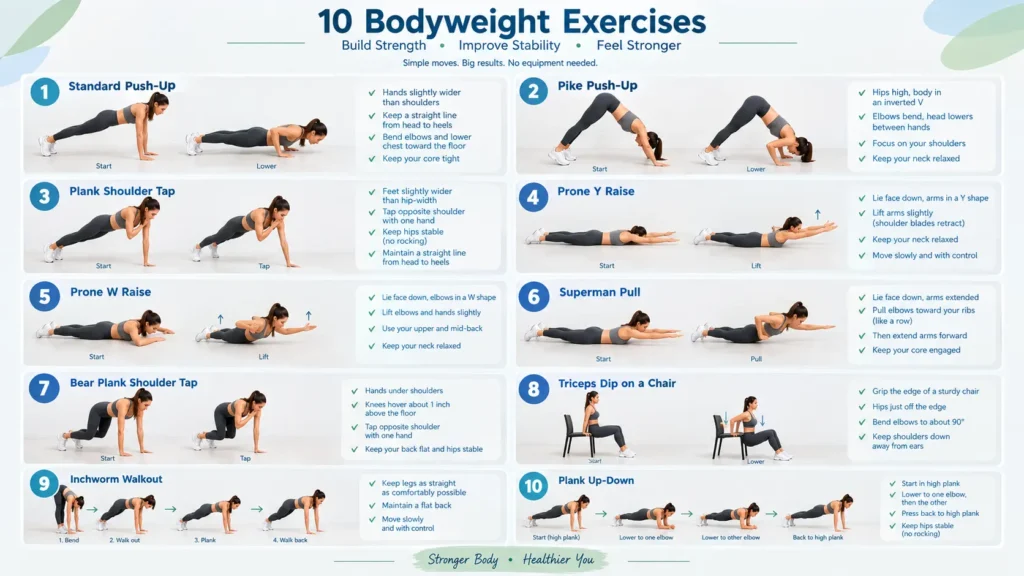
10 No-Equipment Upper Body Workout at Home Exercises
1. Standard Push-Up
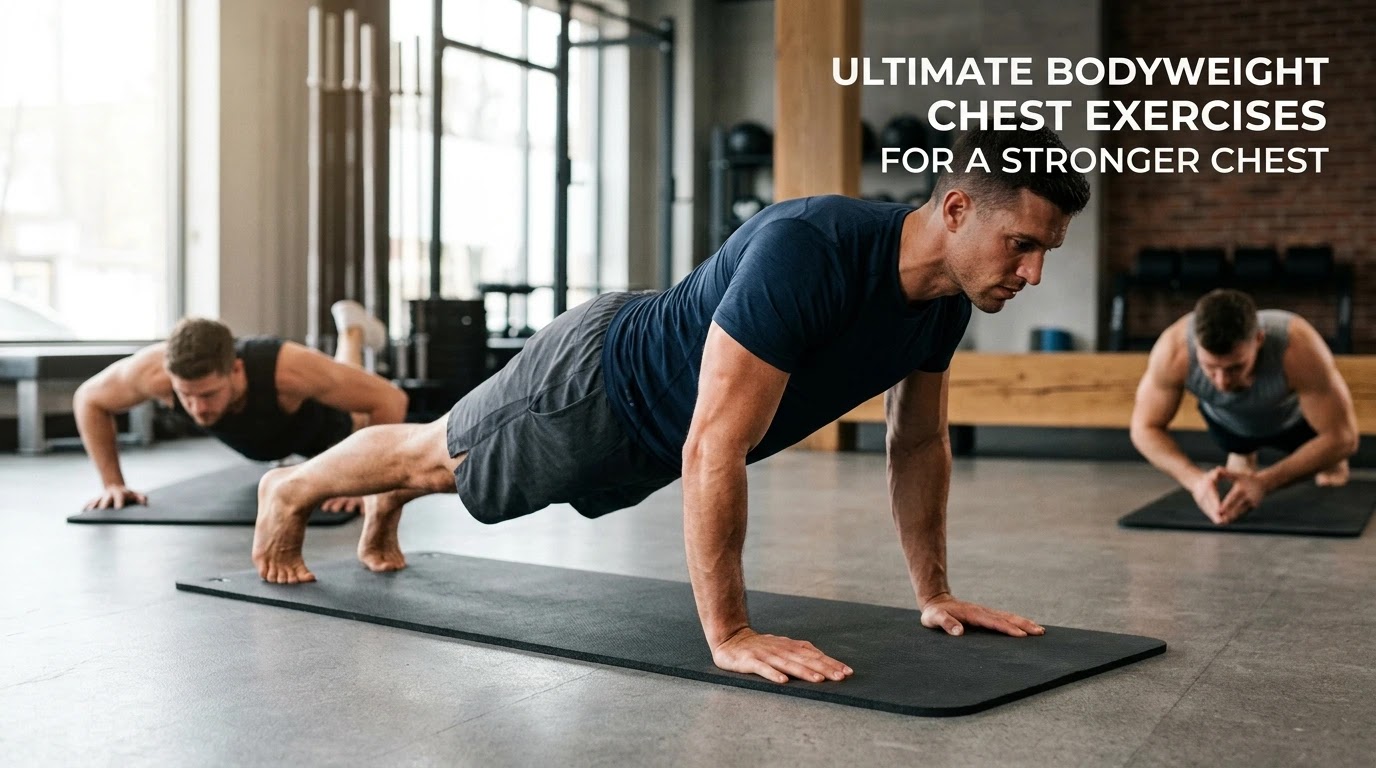
Start in a high plank with your hands slightly wider than your shoulders and your body in a straight line from head to heels. Bend your elbows to lower your chest, then press back up. Easier: drop to your knees or place your hands on a countertop.
2. Pike Push-Up
Start in a downward-dog shape with your hips high and your body forming an upside-down V. Bend your elbows to lower your head between your hands, then press back up. This one works your shoulders hardest. Easier: make the movement smaller and don’t go as low.
3. Plank Shoulder Tap
In a high plank with your feet slightly wider than hip-width, lift one hand and tap the opposite shoulder. Keep your hips as still as you can. Easier: do the taps from your knees.
4. Prone Y Raise
Lie face down with your arms overhead in a Y shape. Squeeze your shoulder blades together to lift your arms, without shrugging toward your ears. Take two seconds to lift, hold briefly, and take two seconds to lower.
5. Prone W Raise
Lie face down with your elbows bent into a W. Squeeze your mid-back to lift your elbows and hands together. Keep your eyes on the floor so your neck stays relaxed.
6. Superman Pull
Lie on your stomach and lift your chest and legs slightly. Pull your elbows toward your ribs like a row, then extend your arms and lower. Lift only as high as feels comfortable, since lifting higher doesn’t help and can strain your lower back.
7. Bear Plank Shoulder Tap
Start on all fours and hover your knees one inch off the floor, with your shoulders over your wrists and your back flat. Tap one shoulder with the opposite hand while keeping your knees up. Easier: hold the bear position without tapping.
8. Triceps Dip on a Chair
Put your hands on the edge of a sturdy chair with your feet planted, and slide your hips off the edge. Lower until your elbows reach about 90 degrees, then press back up. Keep your shoulders down and away from your ears, and don’t go deeper than 90 degrees.
9. Inchworm Walkout
Stand tall, hinge at your hips and touch the floor. Walk your hands forward into a high plank, then walk them back toward your feet with your legs as straight as you can and stand up slowly.
10. Plank Up-Down
From a high plank, lower one elbow at a time to the floor, then press back up, leading with the other arm. Picture balancing a glass of water on your lower back to keep your hips from swaying.
A Simple Upper Body Workout at Home Routine
Do each exercise for 8 to 12 reps, or hold the plank-style moves for 30 to 45 seconds. Choose your level:
| Level | Rounds | Rest between exercises | Rest between rounds |
|---|---|---|---|
| Beginner | 2 | 45 seconds | 2 minutes |
| Intermediate | 3 | 30 seconds | 90 seconds |
| Advanced | 4 | 15 seconds | 60 seconds |
Start your upper body workout at home at beginner level, and move up only when your form stays clean on every rep. Adults are advised to do muscle-strengthening activity at least two days a week (CDC physical activity guidelines), so two or three sessions of this routine fit well.
Pike push-ups are one of the harder exercises for me. I make them more manageable by doing fewer controlled repetitions and taking a short rest before my form starts to break down.
Form Tips for Your Upper Body Workout at Home
Brace your core. Pull your belly button toward your spine so your lower back doesn’t arch during push-ups and planks.
Keep your shoulders down. When you get tired, your shoulders creep up toward your ears. Pull them down and back.
Breathe out on the hard part. Exhale as you push up, and inhale as you lower.
Slow down the lowering. Taking three seconds to lower makes the same move harder without any weights.
| Exercise | Common mistake | Fix |
|---|---|---|
| Push-up | Hips sagging | Squeeze your glutes and brace your core |
| Plank tap | Hips rocking | Place your feet wider |
| Triceps dip | Shoulders shrugging | Press your shoulders down |
| Inchworm | Rounding your back | Keep your spine long |
How to Make It Easier or Harder
To make a move easier, use a wall or counter to incline your body, work from your knees, or use shorter sets. To make it harder, add reps before you add rounds, then slow your tempo and hold the hardest point for longer. Write down your reps, your times and how your form felt after each session. Those notes show you when it’s time to progress.
Recovery After Your Upper Body Workout at Home
Stop right away if you feel sharp pain, numbness or unusual pressure in a joint, especially your wrists or shoulders. Soreness in the muscles is normal. Sharp or pinching pain isn’t.
Leave at least one or two rest days between hard upper body sessions. Sleep, water and enough protein all help your muscles recover. On rest days, a walking workout or light shoulder and neck stretches keep you moving without tiring your arms.
Want to train more? Add targeted back work with our best lat exercises or more bodyweight chest exercises. On your lower-body days, try our leg workout at home or the squats home workout.
If you have a shoulder, wrist or back condition, or pain that doesn’t go away, check with a doctor or physical therapist first. This post is general information, not medical advice.
I usually do this routine a couple of times a week, especially on days when I don’t feel like going to the gym.
FAQ
How often should I do an upper body workout at home?
Two to three times a week on non-consecutive days is a good starting point.
Can I work my back without a pull-up bar?
Yes. The prone Y raise, W raise and Superman pull all work your upper back and lats, and they help balance all the pushing in this routine.
What if I’m a beginner and push-ups feel too hard?
Change your body angle: use a wall, then a countertop, then your knees, then the floor.
How do I protect my wrists?
Warm up with wrist loading, and keep your hands directly under your shoulders. If your wrists still hurt, doing push-ups on your fists can keep them straight. Stop for any sharp pain.
Can I add cardio?
Yes. Short bursts like jumping jacks or mountain climbers between rounds turn this into a full-body circuit.